Inventory System
RepairSuite includes a comprehensive inventory management system for tracking spare parts and products across your branches.
Key Concepts
| Concept | Description |
|---|---|
| Product | A specific part or item (e.g. "iPhone 15 Screen", "USB-C Cable") |
| Inventory | The stock record of a product at a branch — how many you have |
| Stock Level | Current quantity available for a product at a branch |
| Physical Location | A shelf/bin/drawer within a branch where a product is stored |
| Supplier | The vendor from whom you purchase products |
| Purchase Order | A formal order to a supplier to restock products |
| Stock Transfer | Moving products from one branch to another |
| Stock Adjustment | Manually correcting stock levels (e.g. after a physical count) |
| Inventory Return | Returning items to a supplier |
Product Hierarchy
Products are linked to the device/issue taxonomy:
Category (e.g. Smartphone)
  └── Manufacturer (e.g. Apple)
        └── Device (e.g. iPhone 15 Pro)
              └── Issue (e.g. Screen Broken)
                    └── Product (e.g. iPhone 15 Pro OLED Screen)
That linkage is what lets the New Job wizard suggest the right parts once you have picked the device and the fault. Products that are not repair-specific — cables, cases, toolkits — simply carry no device or issue link.
Stock Valuation Methods
RepairSuite supports three inventory valuation methods:
| Method | Description |
|---|---|
| FIFO (First In, First Out) | Oldest stock is used/sold first |
| LIFO (Last In, First Out) | Newest stock is used/sold first |
| Average Cost | Average cost across all stock of that product |
The valuation method affects how the cost of goods sold is calculated in reports.
Stock Movement
Every time stock levels change, a stock movement record is created. Movements happen when:
- ✅ A purchase order is received (stock increases)
- ✅ A part is used on a repair job (stock decreases)
- ✅ A product is sold via POS (stock decreases)
- ✅ A stock transfer is received (receiving branch stock increases)
- ✅ A stock adjustment is approved (stock increases or decreases)
- ✅ An inventory return is processed (stock decreases)
Inventory Flow
Adding New Stock
- Create a Supplier (see Suppliers)
- Create a Purchase Order with items and quantities (see Purchase Orders)
- Approve the PO
- When goods arrive, mark the PO as Received — stock is automatically added
Transferring Between Branches
- Create a Stock Transfer (see Stock Transfers)
- Select source and destination branch
- Add products and quantities
- Submit → the destination branch manager approves and receives the transfer
Manual Adjustments
If you find a discrepancy after a physical stocktake:
- Go to Inventory → Stock Adjustments
- Create a new adjustment with the reason
- Enter the correct quantities
- Save — stock levels are updated immediately
Stock Overview
Settings → Inventory → Stock is the live picture: every product, its current stock, its average unit cost, its value and when it last moved, with counters for normal, low, out-of-stock and negative lines.
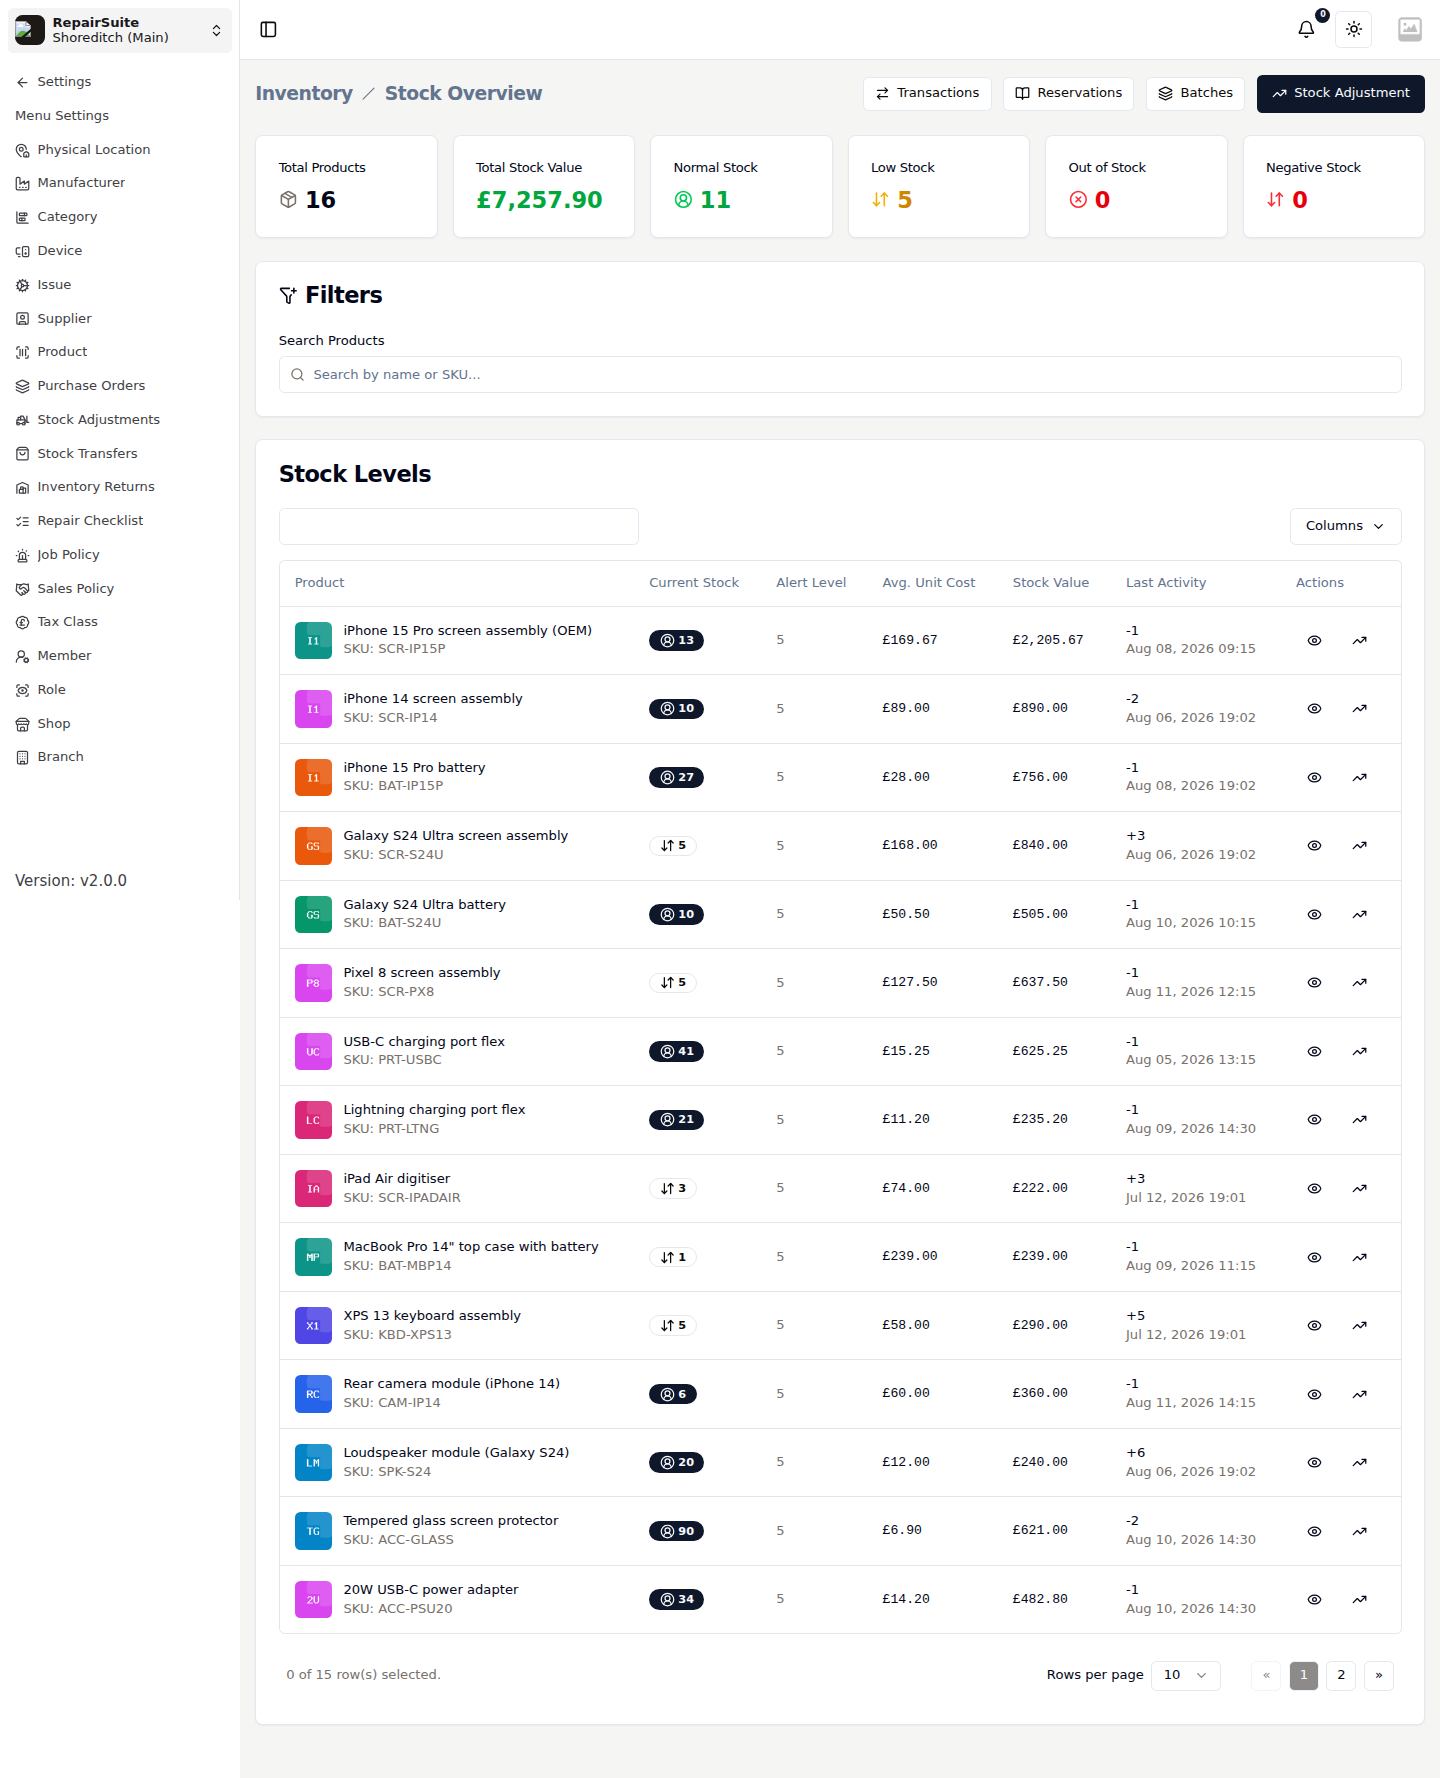
See Stock Overview for the full walkthrough.
The transaction ledger
Alongside stock movements, RepairSuite records a detailed inventory transaction ledger with reservations, batches and cost of goods sold. It powers the Profit Margin and Unified Inventory reports, and is reached from Stock Overview via the Transactions, Reservations and Batches buttons.
| Concept | What it is |
|---|---|
| Transaction | One movement, with its type, quantity, unit price and reference |
| Reservation | Stock held against an open job until it completes |
| Batch | A received consignment, tracked with its own cost and expiry |
| COGS | Cost of goods sold, allocated FIFO from batches |
Low Stock Alerts
Each product carries an alert quantity. When stock reaches or falls below it, the product is flagged as Low Stock in Stock Overview and appears in the Low Stock Product widget on your dashboard.
Physical Locations
You can organise your inventory by creating physical locations within a branch (e.g. "Shelf A-1", "Drawer 3", "Back Room"). Assign a location to each product for easy retrieval.
See Physical Locations for setup instructions.