Repair Jobs
The Job module is the heart of RepairSuite. Every device brought in for repair gets a job, which tracks the work from intake through to collection.
:::note
Jobs were called tickets in earlier releases. The interface now reads Job everywhere, but the underlying records, permissions and URLs are unchanged — a job number still starts with TCI-.
:::
Job List
Select Job in the sidebar to see every job for the branch you are working in.
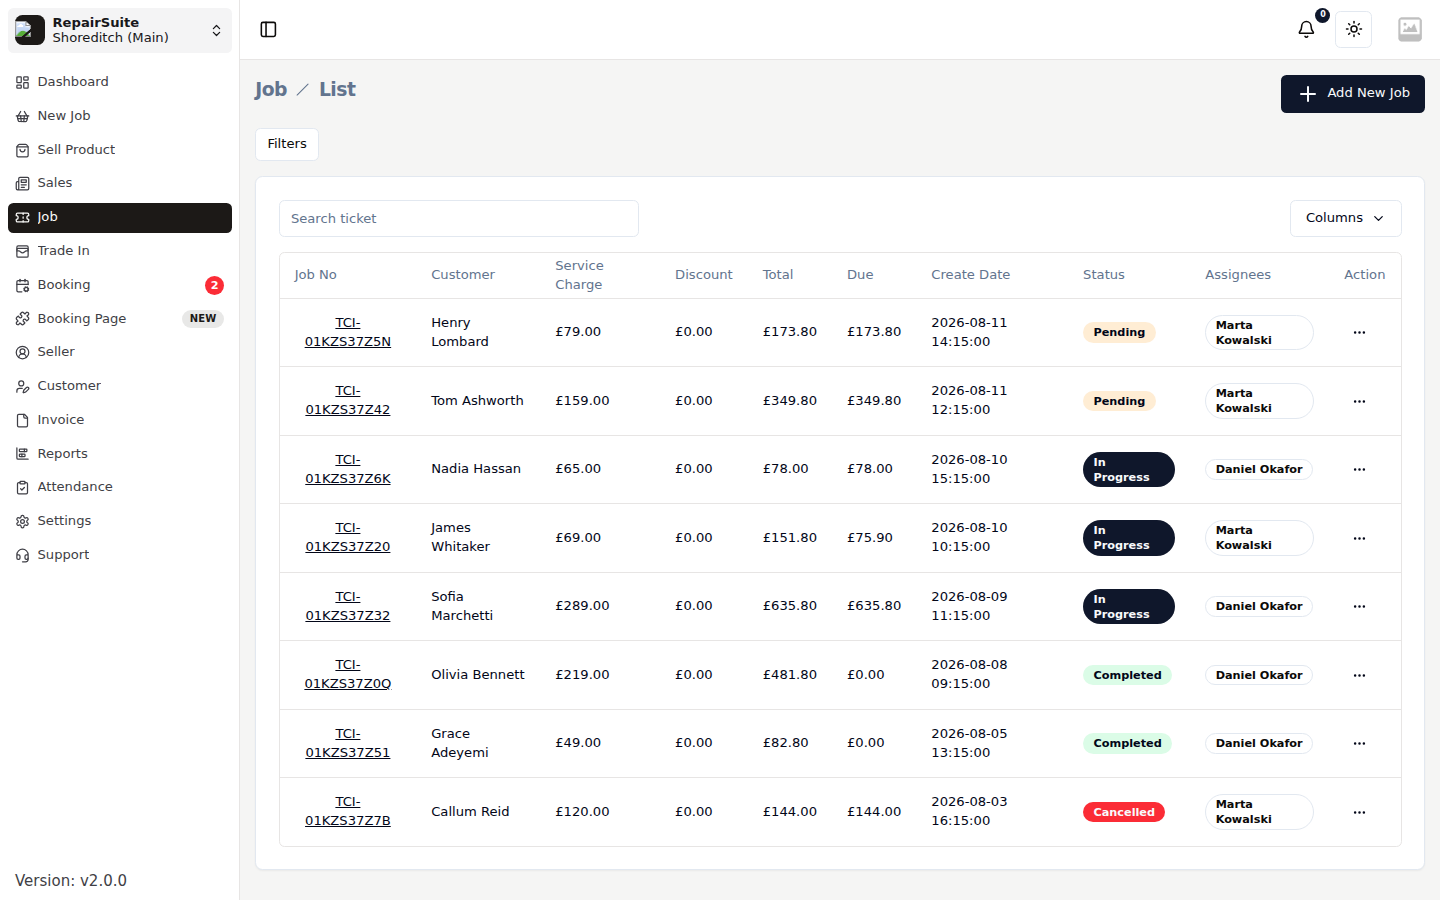
The list gives you:
| Column | What it shows |
|---|---|
| Job No | The job reference (TCI-…) — click it to open the job |
| Customer | Who brought the device in |
| Service Charge | Labour charged for the repair |
| Discount / Total / Due | Money for the whole job, and what is still outstanding |
| Create Date | When the device was booked in |
| Status | Pending, In Progress, Completed or Cancelled |
| Assignees | The technician(s) on the job's items |
Use Filters to narrow by status, date range or amount, and the search box to find a job by number or customer. Columns hides the columns you don't need.
Creating a Job
Click New Job in the sidebar (or Add New Job on the job list) to open the six-step wizard.
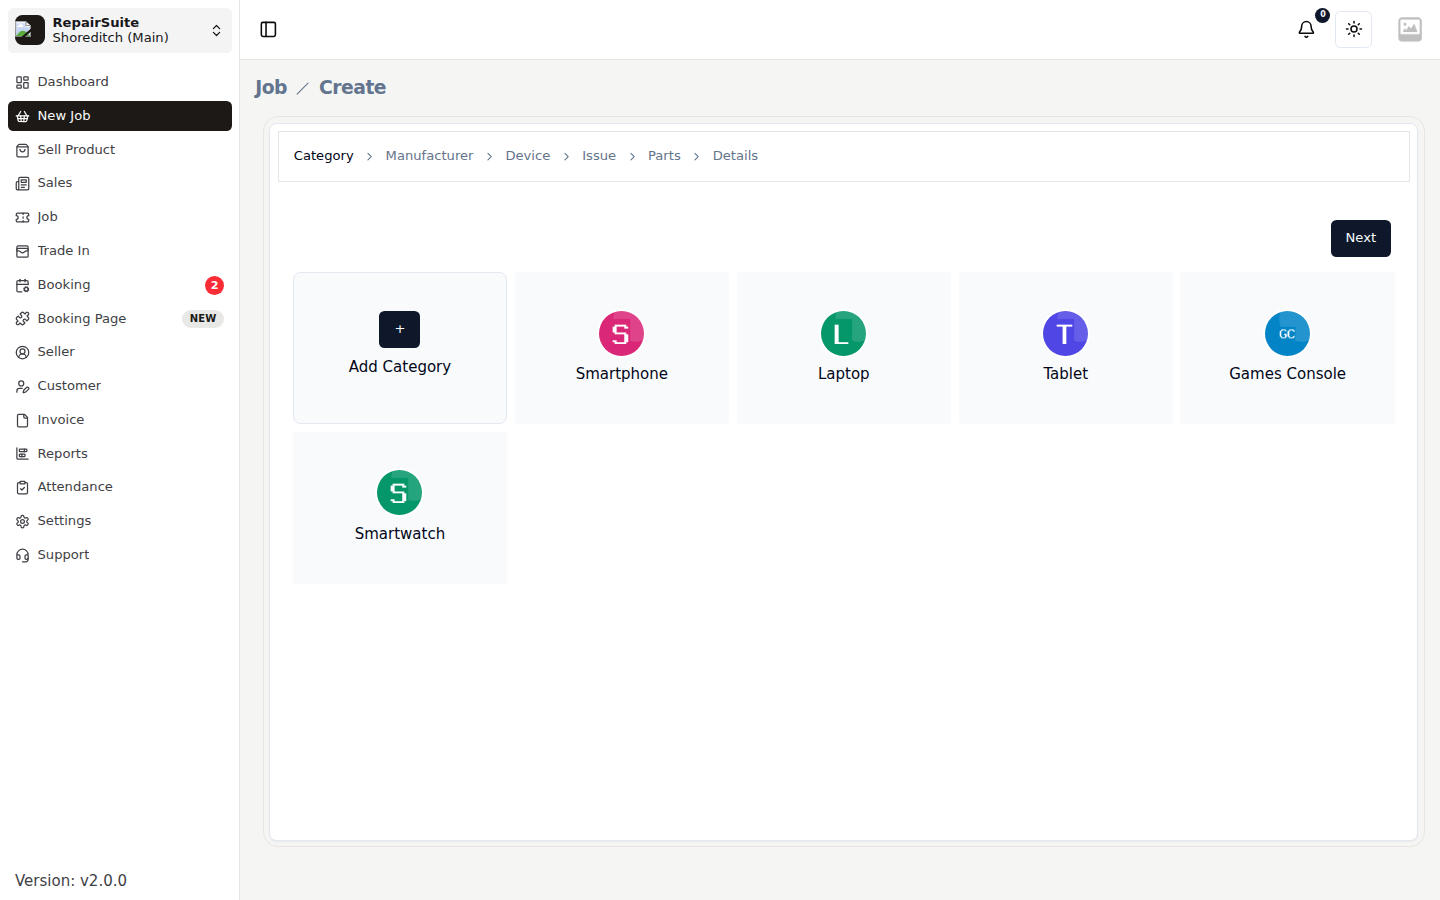
The steps run along the top of the wizard:
| Step | What you choose |
|---|---|
| 1. Category | Device category — Smartphone, Laptop, Tablet, Games Console, Smartwatch |
| 2. Manufacturer | Brand within that category — Apple, Samsung, Google, Dell… |
| 3. Device | The specific model, e.g. iPhone 15 Pro |
| 4. Issue | One or more faults reported by the customer |
| 5. Parts | Products needed for the repair |
| 6. Details | Customer, charges, dates and notes |
:::tip Each step has an Add tile, so you can create a missing category, manufacturer, device or issue without leaving the wizard. Anything you add here also appears under Settings. :::
Issues and suggested parts
Select as many issues as apply — a phone can have a cracked screen and a failing battery on one job. On the Parts step RepairSuite suggests the products linked to the chosen device and issues, so the right screen assembly or battery is one click away. You can still search the full catalogue.
Choosing a part reserves it from branch stock as soon as the job is saved.
Details
The final step captures everything else:
| Field | Description |
|---|---|
| Customer | Search existing customers, or add a new one inline |
| Assignee | The technician responsible for this item |
| Due date / time | When the customer expects the device back |
| IMEI / serial | Device identity, recorded for your records |
| Lock type and code | PIN or pattern, so the technician can test the device |
| Diagnosis note | What you found on the bench |
| Repair charge | Labour for this item |
| Discount / tax class | Applied to the item total |
| Warranty | How long your workmanship is covered for |
| Physical location | Which bench or shelf the device is on |
| Job type | In store or home service |
| Additional note | Anything staff should see when they open the job |
Click Submit to create the job. RepairSuite generates the job number, raises the invoice, decrements stock for any parts used and notifies the customer and the assignee.
Viewing a Job
Click any row in the job list to open the job.
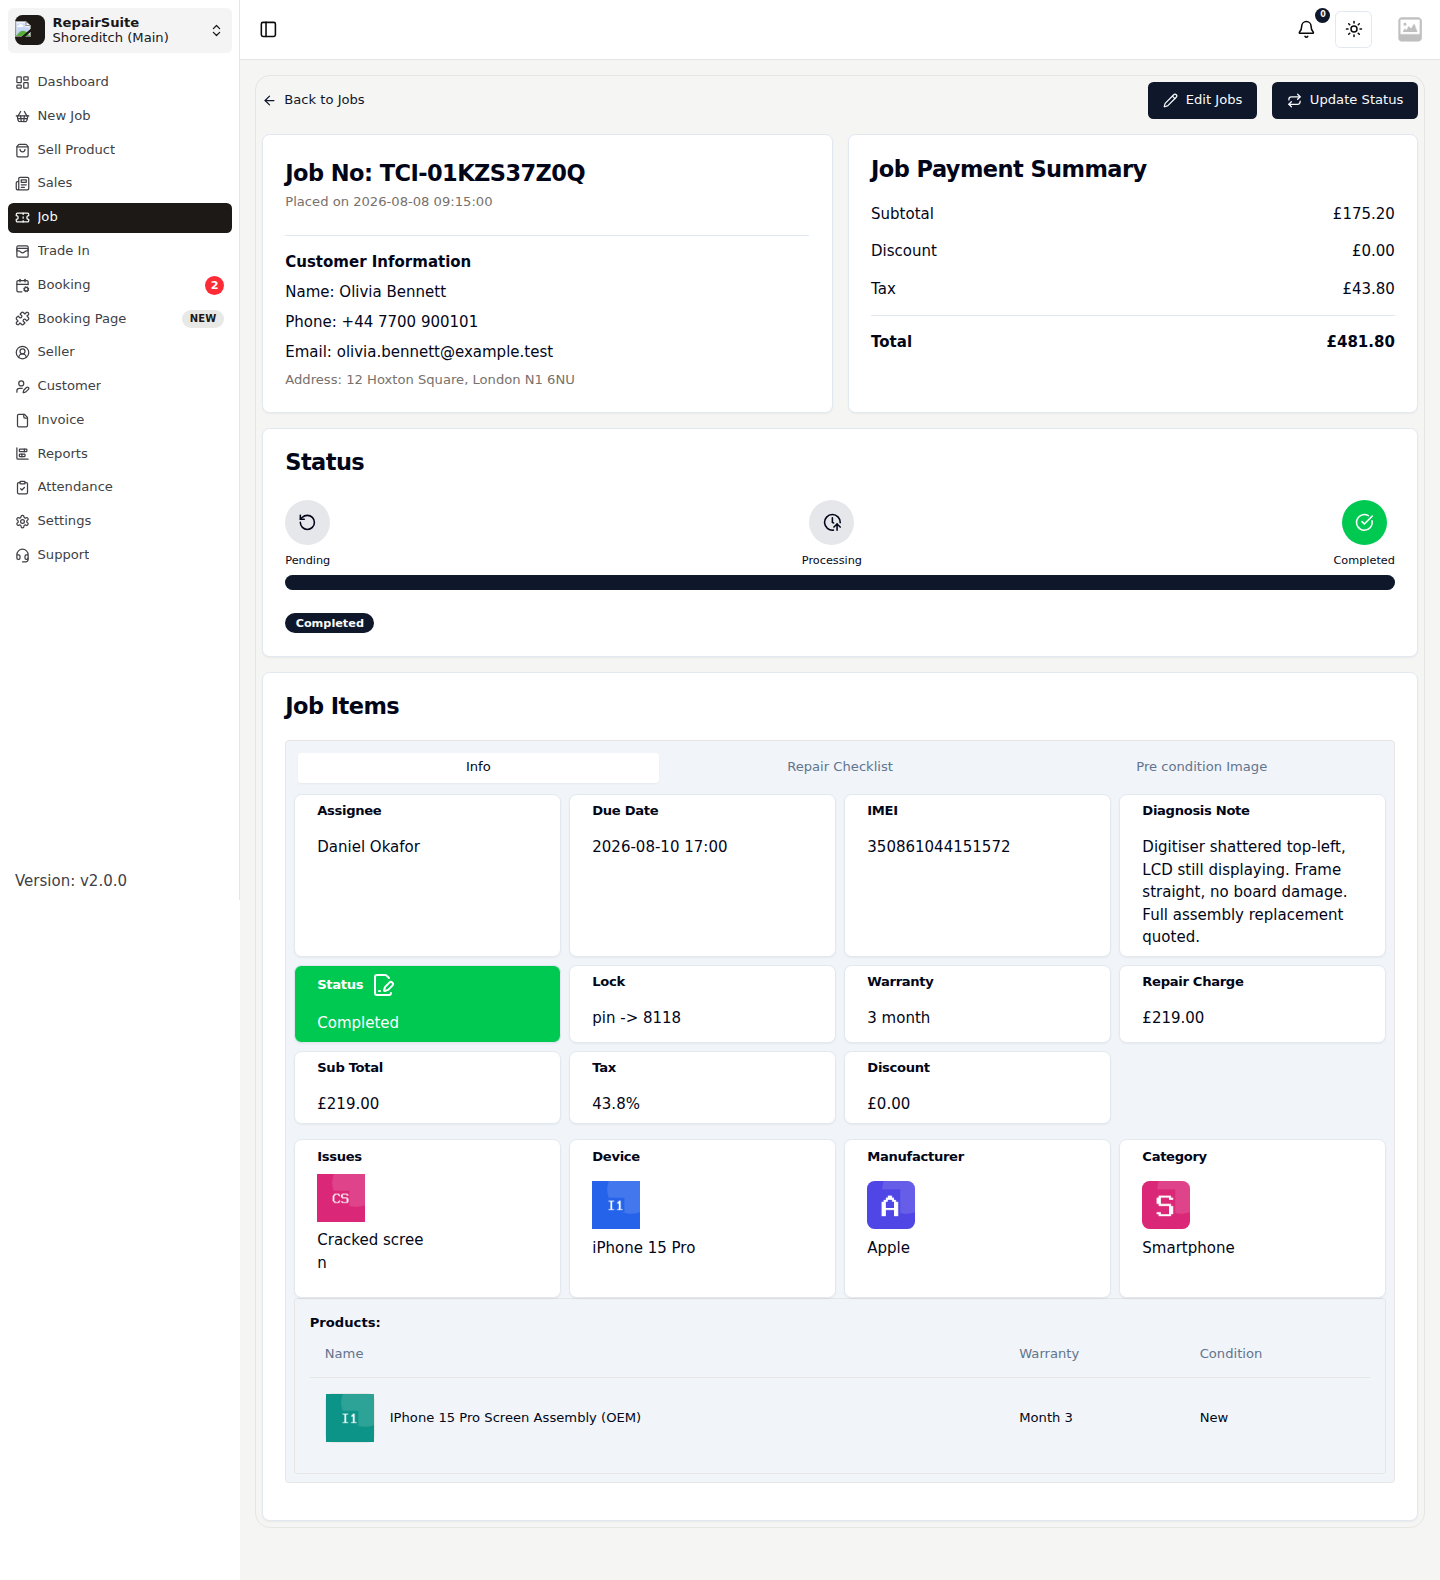
The page is laid out as:
- Job No and when it was placed
- Customer Information — name, phone, email and address
- Job Payment Summary — subtotal, discount, tax and total
- Status — a Pending → Processing → Completed timeline
- Job Items — one card per device, with three tabs: Info, Repair Checklist and Pre condition Image
Use Edit Jobs to reopen the wizard, and Update Status to move the job on.
Job Statuses
| Status | Meaning |
|---|---|
| Pending | Booked in, not started |
| In Progress | On the bench |
| Completed | Repair finished, device ready for collection |
| Cancelled | Job stopped — a cancellation note is required |
Individual job items carry their own task status, which adds Diagnosing and Reopened for tracking work that is still being investigated or has come back.
Repair Checklist
If you have set up Repair Checklists for the device category, they appear on the Repair Checklist tab of each job item. Tick items off as the technician completes them; progress is visible to everyone working the job.
Pre-Condition Images
The Pre condition Image tab records the state of the device before you touch it.
- Open the job and select the Pre condition Image tab
- Click Add Image
- Upload a photo, or capture one with the webcam
:::tip Pre-condition photos are the fastest way to settle a dispute about damage that was already there when the device arrived. :::
Cancelling a Job
- Open the job
- Click Cancel
- Enter the reason
- Confirm
Cancelled jobs stay in the list with a red Cancelled badge, and the reason is stored on the record.
Job Invoice
Every job has an invoice created alongside it.
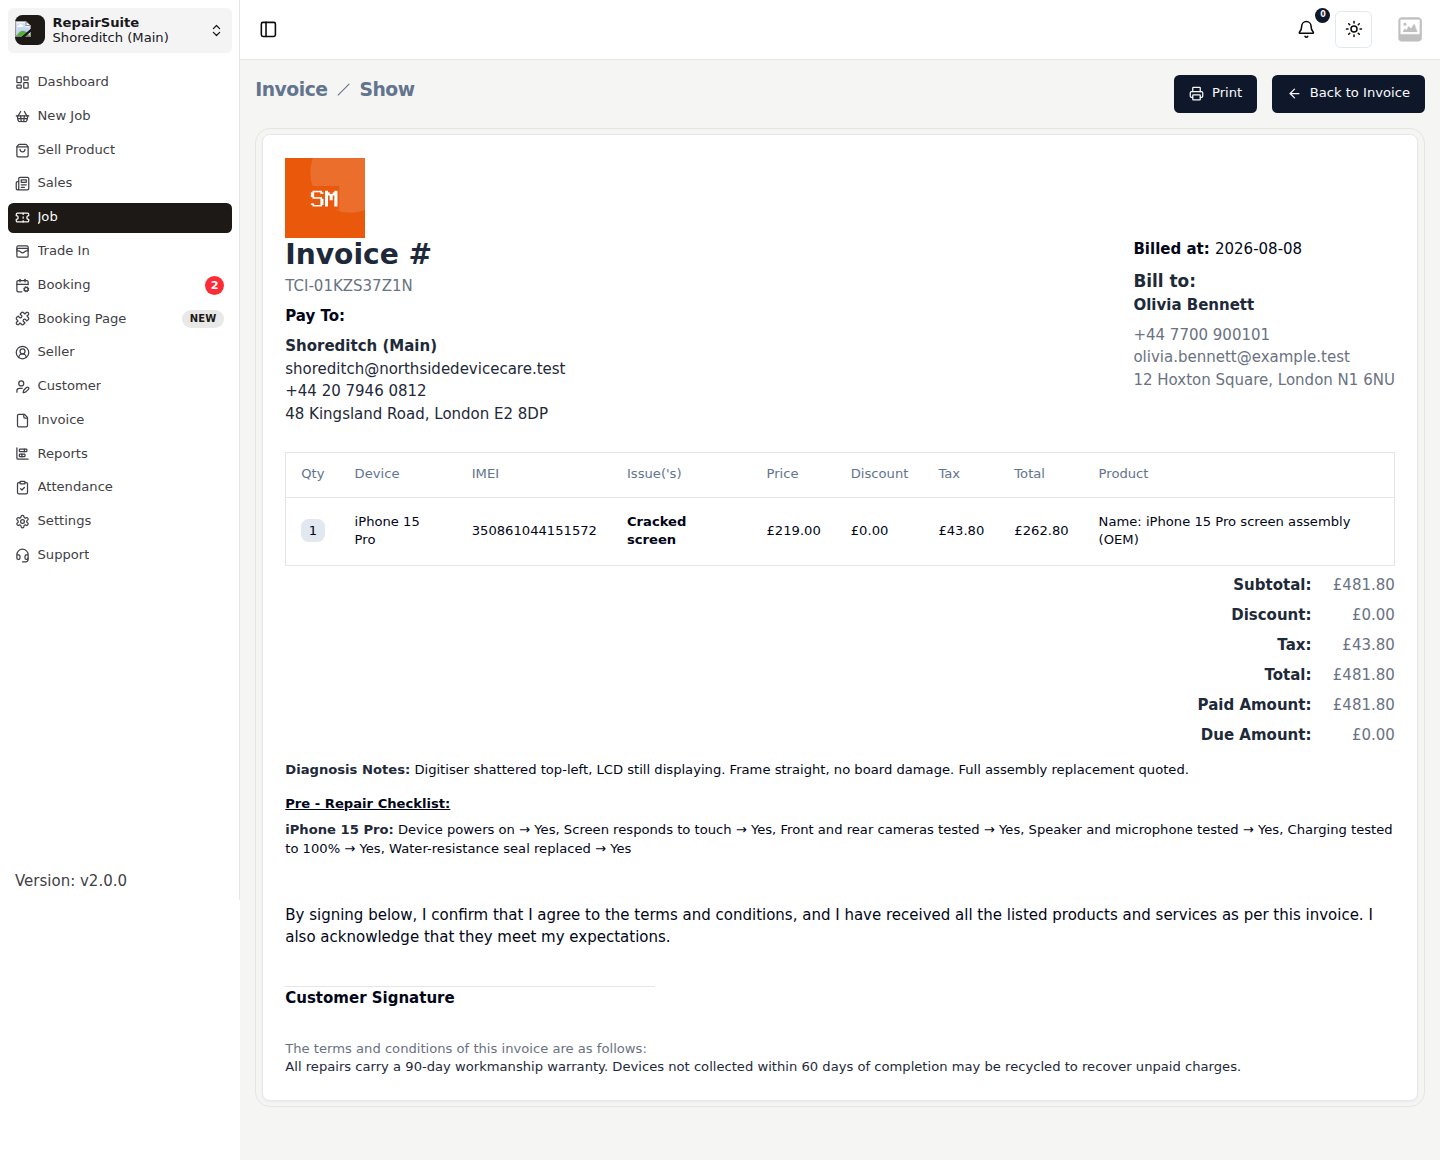
From the invoice you can take payment, print, or download a PDF for the customer. See Invoices for the full payment workflow.
Printing a Job Label
Open the job and click Print Label. RepairSuite streams a PDF sized for a label printer, carrying the job number, customer and device, so the right device is easy to find on the shelf.
Related
- Job Lifecycle — the end-to-end flow, including notifications
- Repair Checklists
- Job Policy — terms printed on job invoices