Set Up Your Shop
After registering and verifying your email, the first thing you need to do is create your shop. A shop is the top-level entity in RepairSuite — everything (branches, staff, customers, inventory) belongs to a shop.
Prerequisites
- Verified email address
- Logged in as a Shopper
Creating Your First Shop
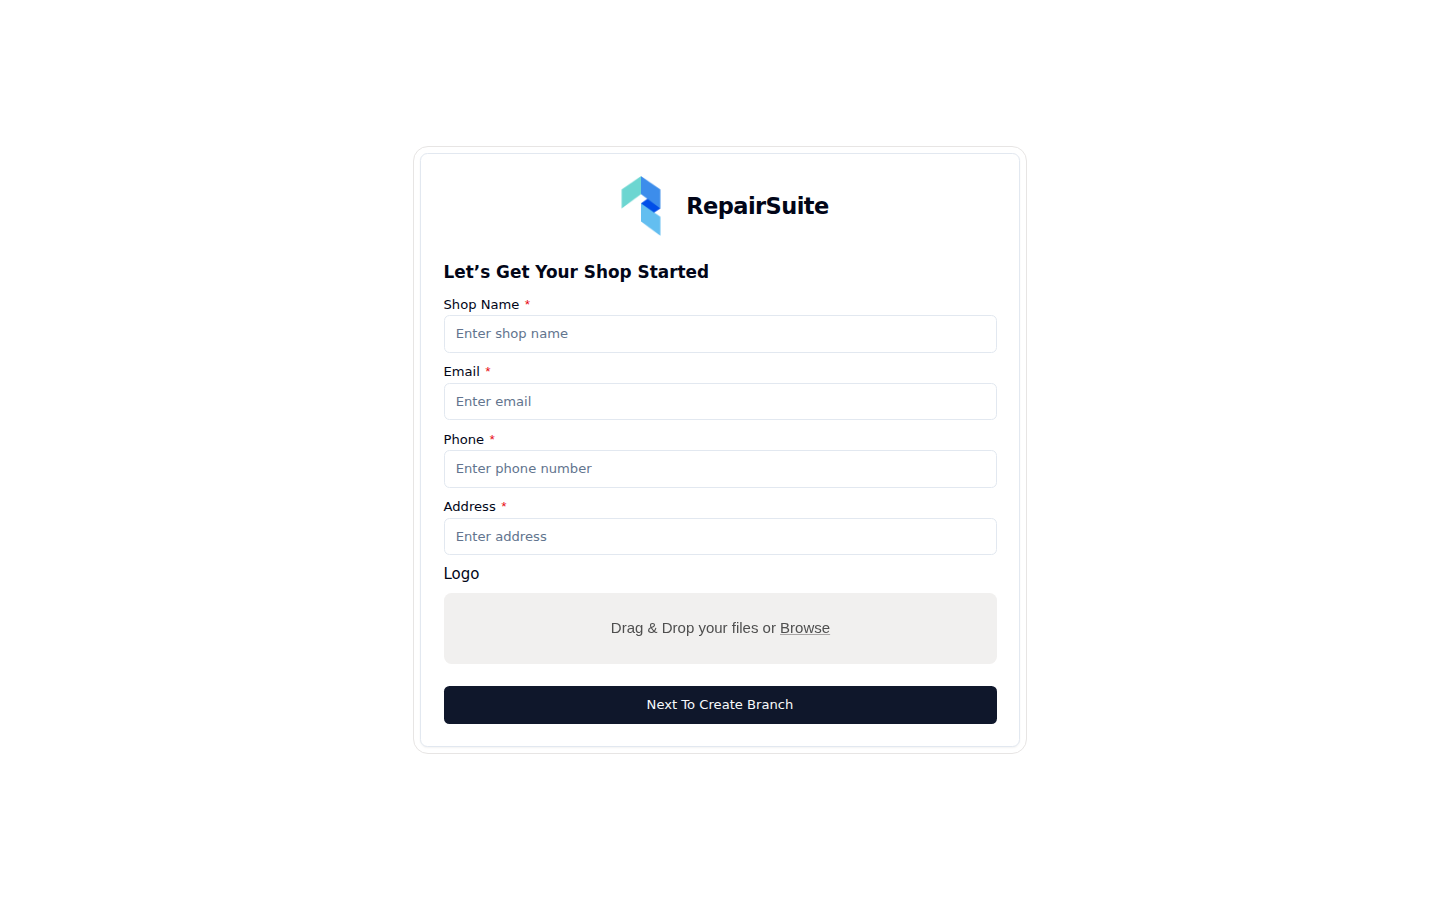
When you first log in after email verification, RepairSuite will automatically redirect you to the shop creation form if you don't have a shop yet.
Alternatively, navigate to Settings → Shop and click Create Shop.
Required Fields
| Field | Description |
|---|---|
| Shop Name | Your business name (e.g. "TechFix Repairs") |
| Phone Number | Primary contact number |
| Shop contact email | |
| Address | Physical address of the business |
Optional Fields
| Field | Description |
|---|---|
| Logo | Your shop logo, shown on invoices, labels and the sidebar |
Steps
- Navigate to Settings → Shop (or you'll be redirected there automatically).
- Click Create Shop (or New Shop if you have the button).
- Fill in your shop name, contact phone, email, and address.
- (Optional) Upload a shop logo.
- Click Save.
:::tip Your shop logo appears on job invoices, sale and trade-in invoices, printed job labels, and in the sidebar. Upload a PNG or JPG of at least 200×200px. :::
After Creating Your Shop
Once your shop is created, you'll need to create at least one Branch before you can use RepairSuite's main features.
→ Continue to Set Up Your Branch
Managing Multiple Shops
RepairSuite supports multiple shops under one account. Navigate to Settings → Shop to view and manage all your shops.
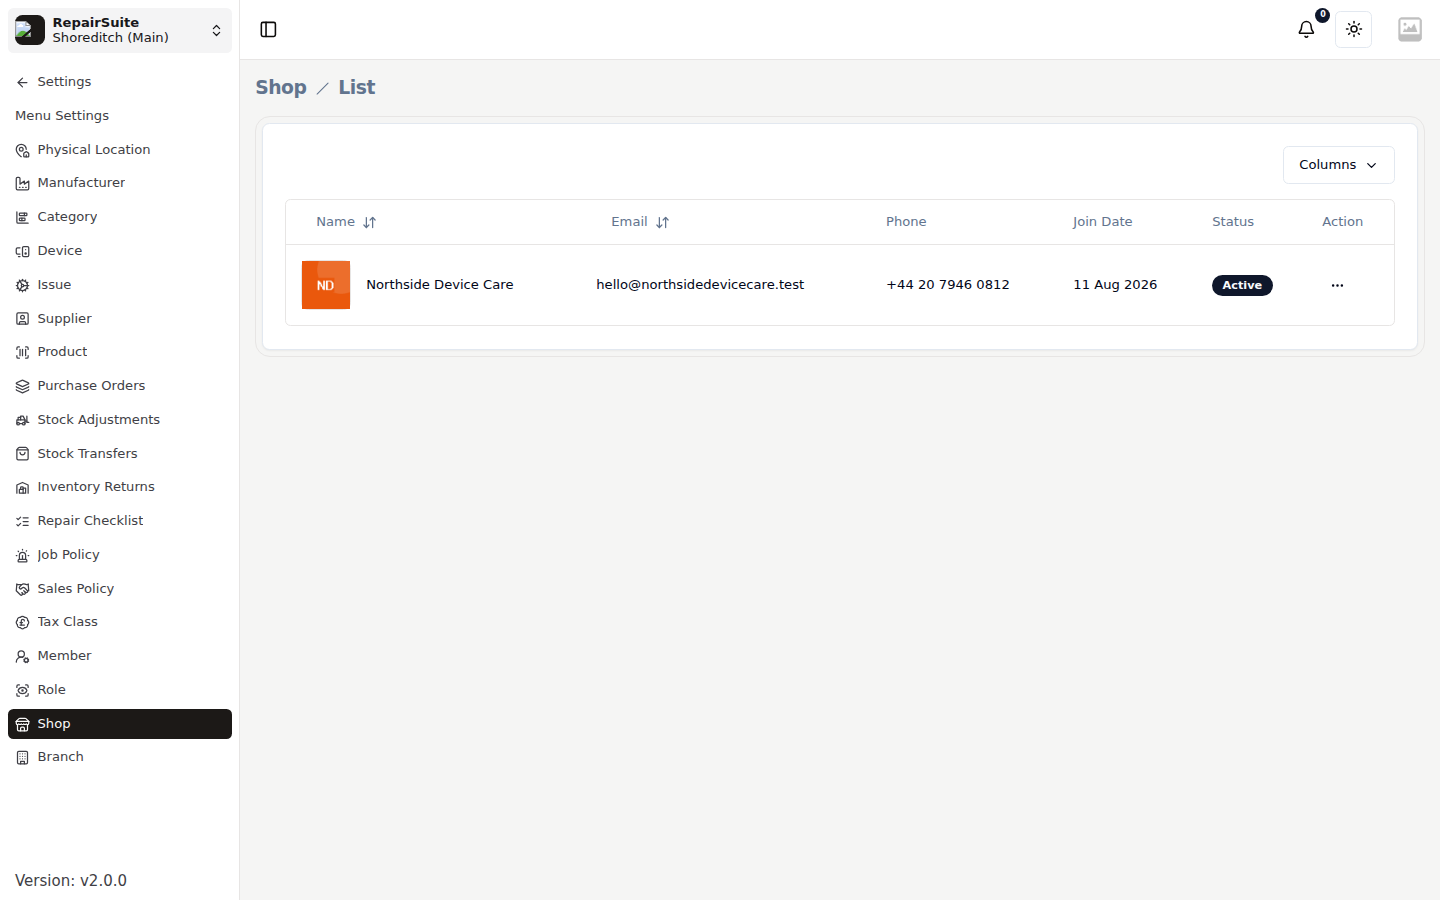
To add another shop:
- Go to Settings → Shop
- Click Create Shop
- Follow the same steps above
To edit an existing shop, click the ⋯ action menu on the shop row and select Edit.
:::note Each shop is independent and has its own branches, customers, and inventory. You can switch between shops from the shop management area. :::